First off, I apologise that it may be a bit late for most members who are seasoned gardeners, however those members who have had little or no experience with Grow Your Own (GYO) may find this guide useful & may be inspired to give it a go. You can sow seeds any time until the middle of April in my experience, depending on what plant you’re growing of course. Check the back of your own seed packet to make sure your plant will be suitable for starting now.
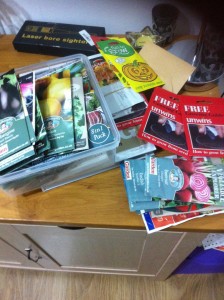
My guide is split into 3 parts. Basic plant needs 1st & then followed by part 2 on how to sow the seeds. Finally part 3, things to be aware of when you start out with GYO
Part 1. Plant needs.
I won’t go into the scientific needs of plants, ph levels of soil and so on because if I’m totally honest, I don’t understand most of this myself. What I do know from my own experiences is that plants need the following to grow successfully.
(1) Space. A container or patch of ground to grow in provides this.
(2) Soil or other growing medium (excluding hydroponics & all the specialised growing methods)
(3) Water. Same as us, without it they die. Too much they die.
(4) Heat & light. Usually provided by the sun but in the early days for me, it’s supplied by the warm kitchen.
(5) Attention. While they do pretty much take care of themselves most of the time, they do require some effort on your part & attention paid to they’re environment & how they are growing.
In a nutshell, that’s pretty much all a plant needs to grow. Give your plants those 5 things as & when they need them & you should get plants growing from seed through to harvest.
Part 2. Sowing of seeds
Now for the actual sowing of your seeds. What you’re growing decides how you sow your seeds. For example I soak pea, bean & sweetcorn seeds for an hour in lukewarm water (I use a food thermometer & get it around 30 degrees C) as the water needs to penetrate a hard outer shell, where as tomato seeds go straight onto the compost.
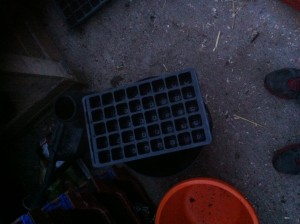
For your container (plant requirement 1 above) you can use anything from yoghurt pots to old Wellington boots. The key thing is it must have drainage & it must hold the soil in place. I use propagator seed trays with individual plant cells. These cost a couple of quid from B&Q etc.. but you may be able to pick them up cheaper elsewhere.
For soil or growing medium (plant requirement 2) there are hundreds of different compost mixes available from garden centres. I now make my own potting mix, but when I 1st started I used compost from the bog standard basic tomato grow bags & they done me fine. What I did have to do is break up the big lumps & separate any twigs, large bits etc.. that may be too big for the small plant pots or cell trays. You need to get the soil broken down & free from any large lumps. At this stage, fill in the container you’re using to grow your plants in to the brim. Once filled up, gently compress the soil down & refill/compress until it’s about 1/4 inch from the brim of the container.
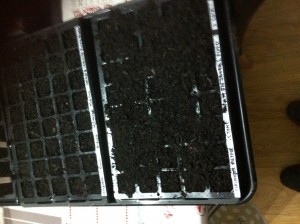
Sow the seeds following the seed packet instructions. Some require planting deep down in the soil, others require sowing on the soil surface & covering with a light dusting of compost.
Water gently (Plant requirement number 3). I use a spray bottle that you can get for around 50p from asda/tesco/wilko or wherever. The soil needs to be moist but not drenched. Luckily if you overwater, the drainage holes will allow the excess water to run free. It might be an idea to put it on a saucer or tray to catch any excess water.
At this stage I cover the seed container with the clear propagator lid, but you can use cling film for now. It needs to cover the top of the pot/container you’re using, but not wrapped tightly as the plants still need air. The purpose of the clear covering on the plant pot is to allow light in, while keeping warmth & moisture from escaping above as much as possible in the early days. Remember heat & light were plant requirement number 4. It’s important to note that some people swear by putting their seeds in an airing cupboard to start with. I always had trouble with plants growing too tall & thin in warm dark spaces so again, the method I describe works well for me. You could always do 2 lots & see which method works best for you.
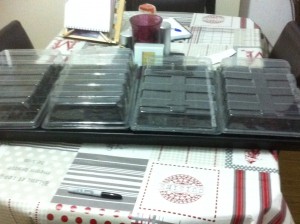
Attention is the last plant requirement (number 5 above). I check my seeds daily for the 1st signs of green shoots. I also check the moisture level of the soil by sticking my finger in it. If it’s moist I leave it, if it’s dry I water it. I always replace the clear cover on top after each inspection & leave it in place until the 1st seedling is touching the cover. Then I remove it completely.
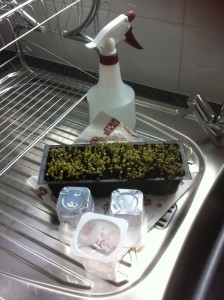
From here on, you should have some healthy seedlings & by paying regular attention to the 5 needs above, you should see yourself fine.
Part 3. Things to be aware of.
Here is a list of things to be aware of when you start out with GYO.
Space. Plants need space for healthy roots. Keeping plants in a small pot eventually leads to the roots becoming so compressed they die. Once the seedling looks a reasonable size & is looking healthy, you need to transfer them to a bigger pot (called “potting on”). It’s simply a case of filling a larger pot with soil, making a hole for the plant roots, gently (so you don’t snap the plant stem or roots) remove the plant from the small pot & put in the hole in the soil of the bigger pot. Firm it all in & add more soil or compost if needed. Water well & leave it for a day or so.
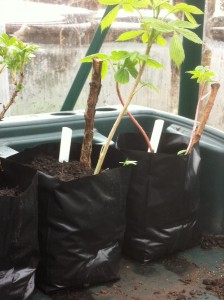
Also you may well have more than 1 seedling growing in your pot. You need to do something called pricking out or thinning out (different names depending on your location & also what your eventual aim is). It’s basically making sure each plant has it’s own pot/space to grow in. Google it & the web will give you more details. I will say though, be very careful when separating seedlings as you don’t want to snap roots or damage the stems.
Plant food. Plants make their own food through photosynthesis. However what plants do need is key elements to help them grow strong. As I said above, I won’t go into the scientific needs but you can get general “plant feed” or more specific feed depending on what you grow (tomato feed is the most common). You can buy it or you can make your own. It’s upto yourself if you want to go organic or not, I try to personally but don’t stick to it religiously. In general heavy cropping plants grown in containers (tomatoes, cucumbers for example) need this treatment while plants grown directly in the earth can generally manage without but will still benefit from it. READ THE LABEL ON THE BOTTLE/PACKET. Make sure you dilute it to the correct strength required & only water the soil around the plant or in the container. Don’t water it directly onto the plant leaves unless the bottle specifically instructs you to.
Labels. If you’re growing more than 1 type of seed, use labels so you know what is what. When seeds 1st grow they all look identical & you don’t want to get your tomatoes mixed up with your onions for example.
Time. Seeds need time to germinate. If nothing has sprouted after 21 days though, assume something is wrong.
Obtain plants. As a quick fix or if it’s too late to grow from seeds, you can always start with young plants. Get these from garden centres (but you pay the price financially) or from family/friends. From here, carry on with the 5 plant needs & you should be fine.
Online reading. Whatever you’re growing, google it. “Grow your own tomatoes” for example (replace tomatoes with whatever you are growing) is a simple search term but will give you plenty to read up on & it’s all free to read.
That’s it for my getting started with GYO guide. If you’re wanting to try GYO but are not sure of something, google it or ask on the forum as there are many members on there who are keen gardeners. My last bit of advice is, if you want to try something new for GYO but aren’t sure, research online 1st & give it a go (test on 1 plant only if it’s trying something with established plants). The worst that can happen is it doesn’t grow or your plant dies. Now is the time to experiment so you know what works for you & what doesn’t. Don’t wait until your life could depend on it.
